Making a chocolate ganache drip cake can be a bit intimidating. For years, I simply melted chocolate with a bit of oil and dripped that around my cakes. Although it worked pretty well, I was never completely satisfied with the final look and decided to try it with chocolate ganache instead. After working to find the right ratio of chocolate-to-milk, I was blown away by how simple it actually is and how pretty it looks on cakes! I’ll never go back to the chocolate-oil method again.
Ingredients
In addition to having a frosted cake, you’ll want to have at least a half batch of my chocolate ganache recipe. It requires just two simple ingredients:
Non-dairy milk: Use a thick non-dairy milk for the best outcome. I typically use soy or oat milk.
Non-dairy chocolate: I recommend using a high quality semi-sweet chocolate bar for the best outcome, but you can also use chocolate chips if necessary.
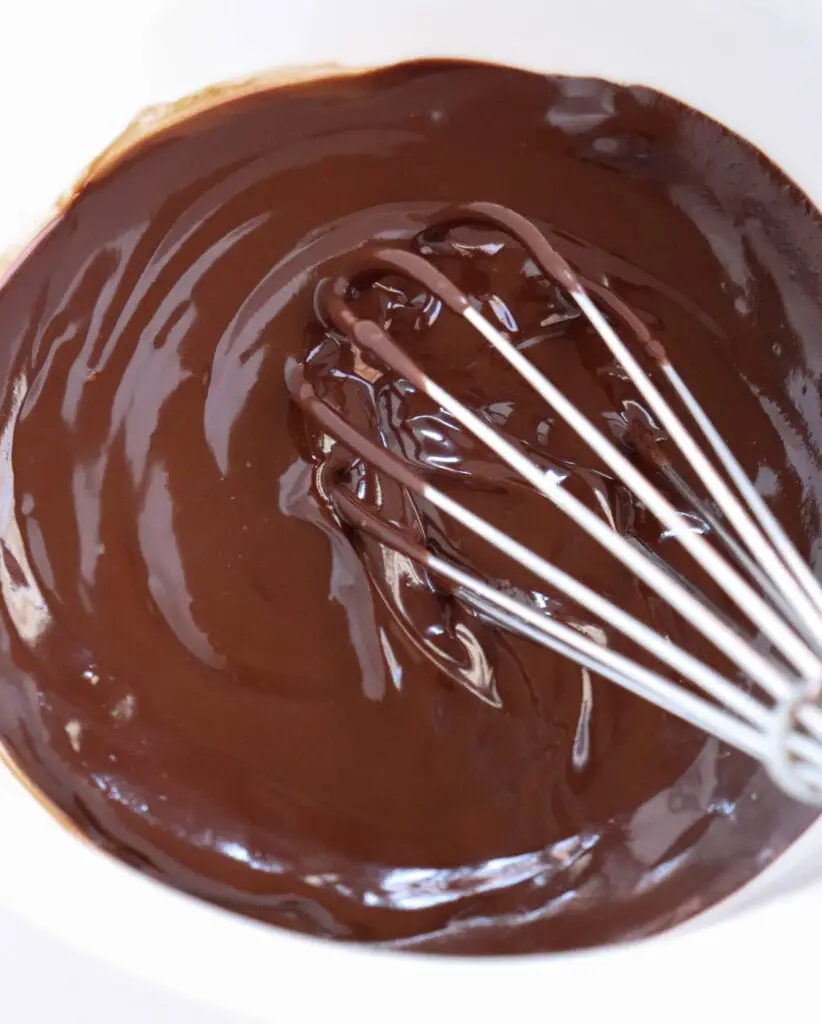
How to make the ganache
This ganache is simple to make and beginner-friendly. You can find an in-depth blog post here, but below are step-by-step instructions for making it.
- Prepare. Place 4 ounces (~3/4 cup) of chopped chocolate or chocolate chips in a heat-resistant bowl. Pour 1/2 cup of non-dairy milk in another heat resistant bowl or a saucepan.
- Heat the milk. Heat the milk in the microwave or on the stovetop until it’s hot but not yet boiling.
- Pour over the chocolate. Pour the milk evenly over the chocolate but don’t stir yet.
- Allow to sit. Let the mixture sit, without stirring, for approximately three minutes.
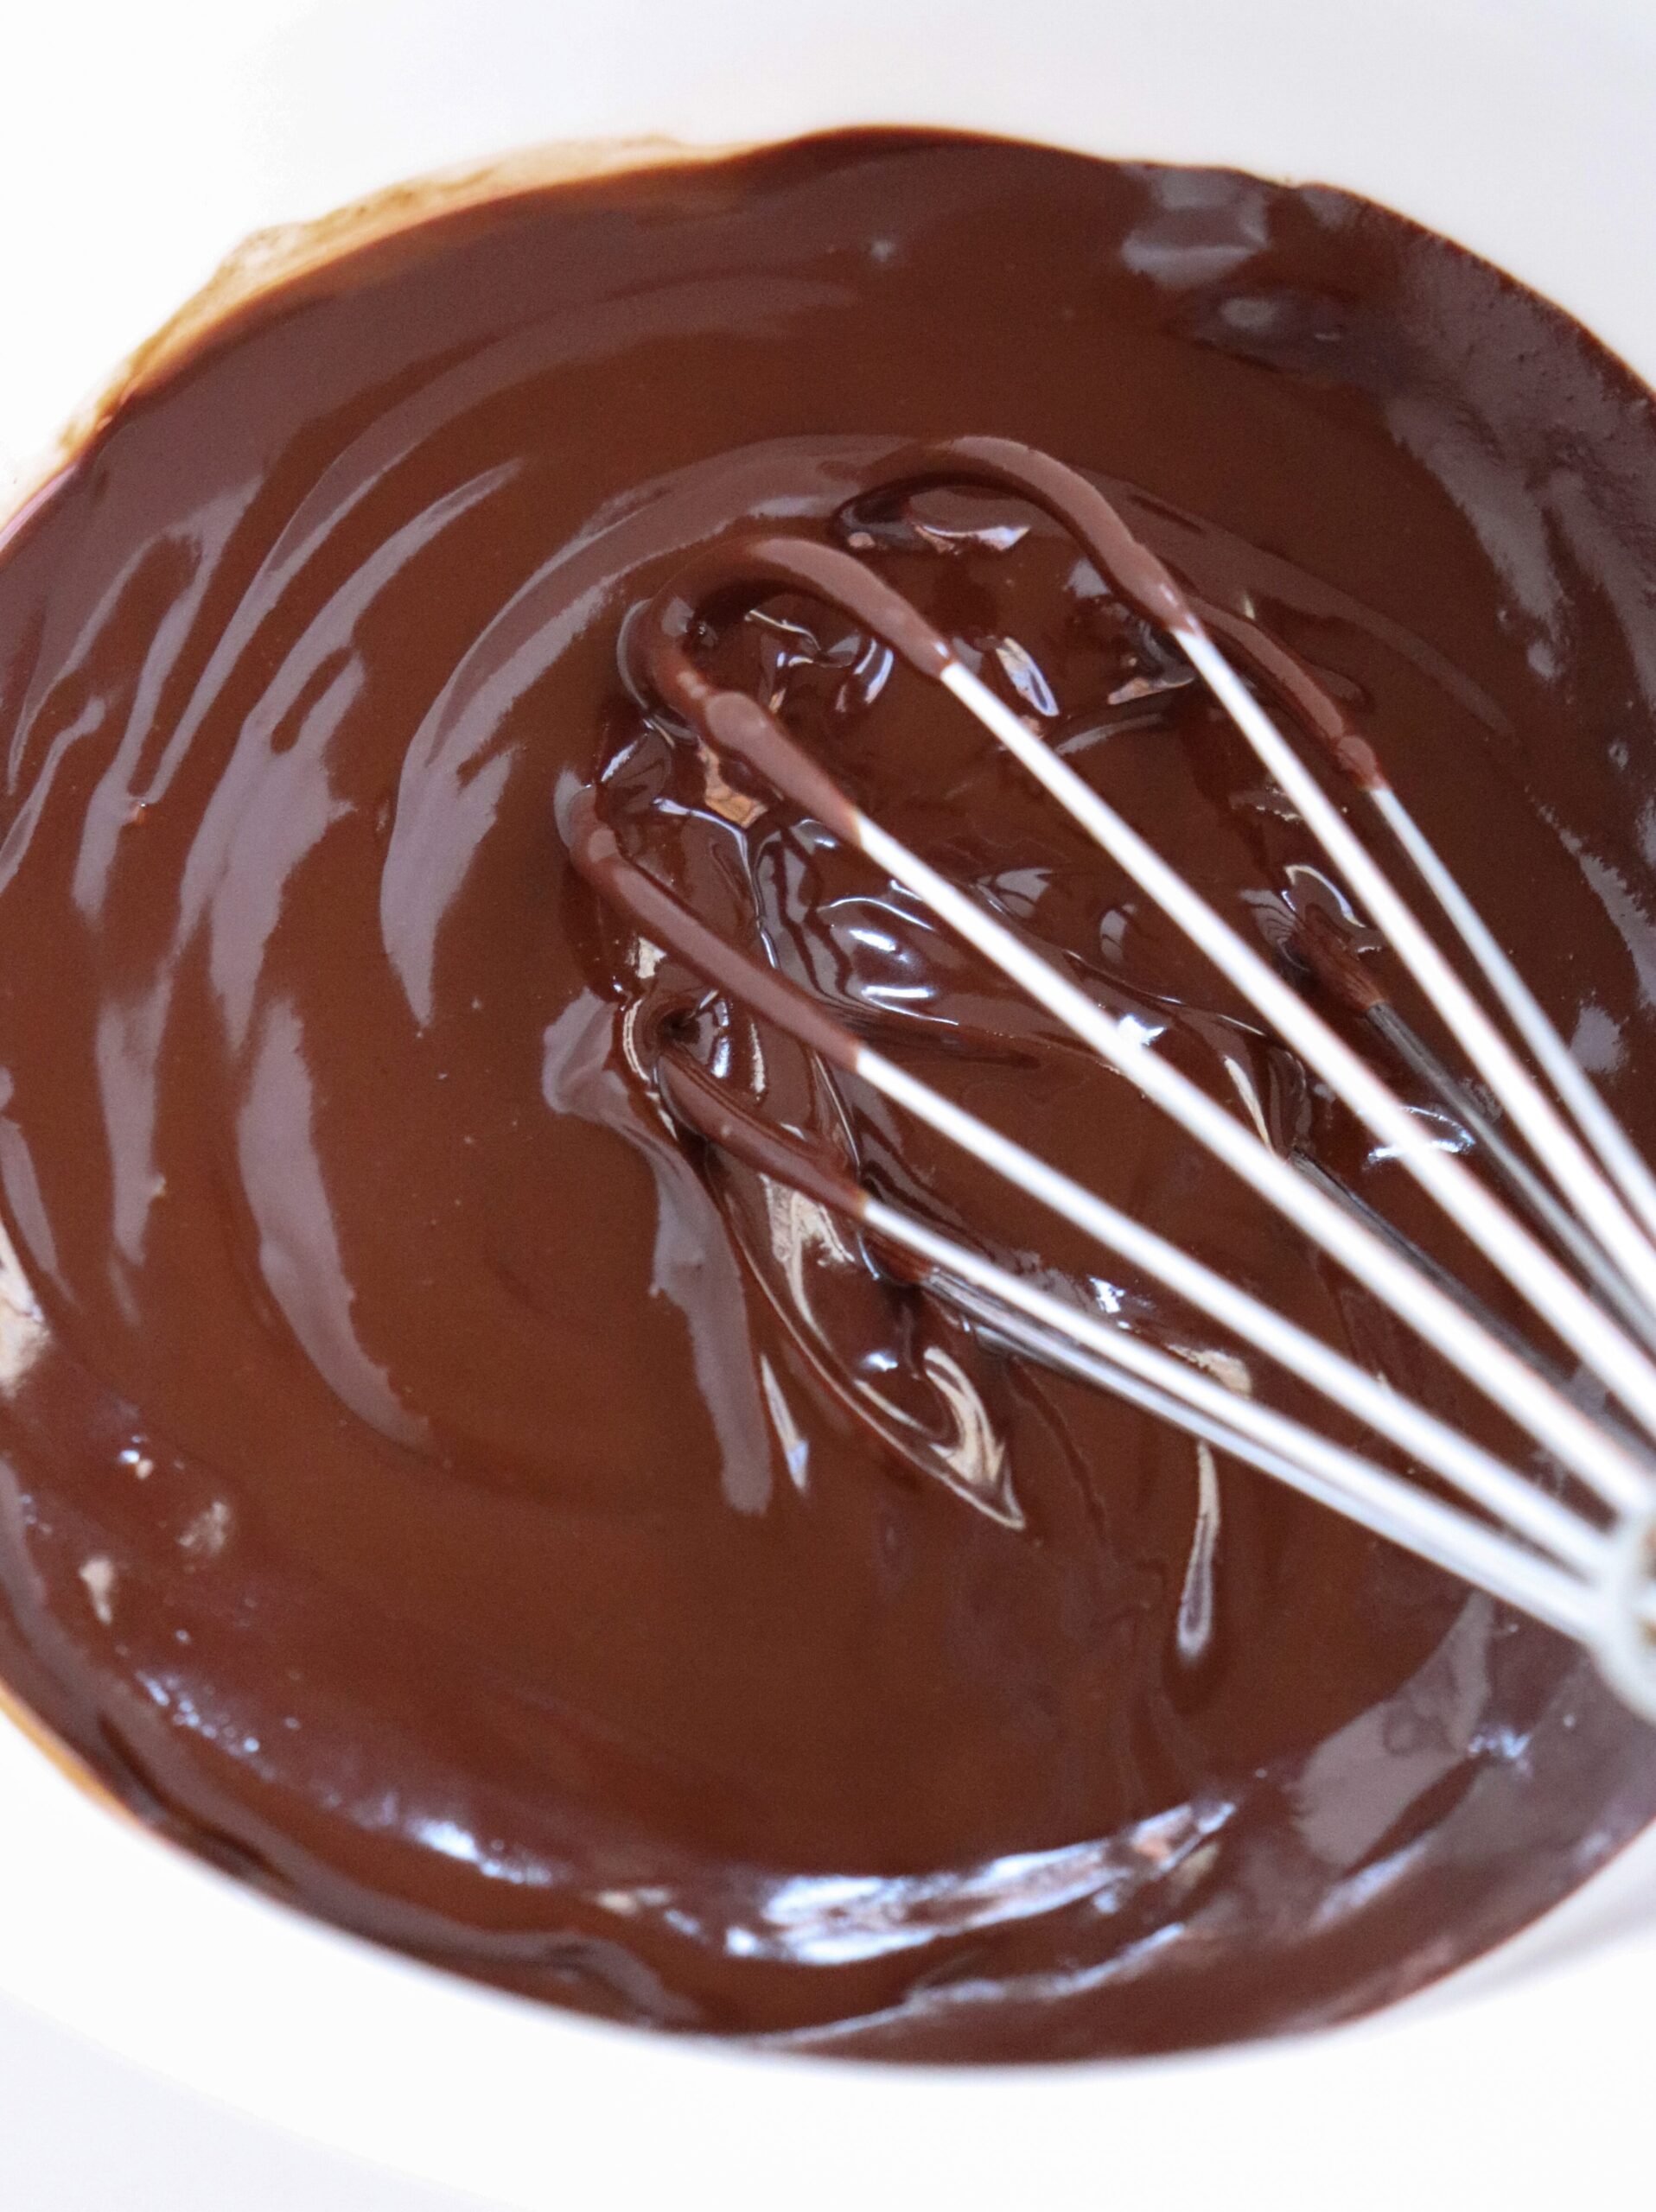
- Mix. Use a fork or small whisk to stir the mixture until smooth and creamy.
- Cool slightly. Cool the ganache slightly before using.
This recipe makes approximately 1 cup of ganache, which should be more than enough for a 6″-9″ cake. You can save any leftover ganache for later by following the instructions lower down in this post.
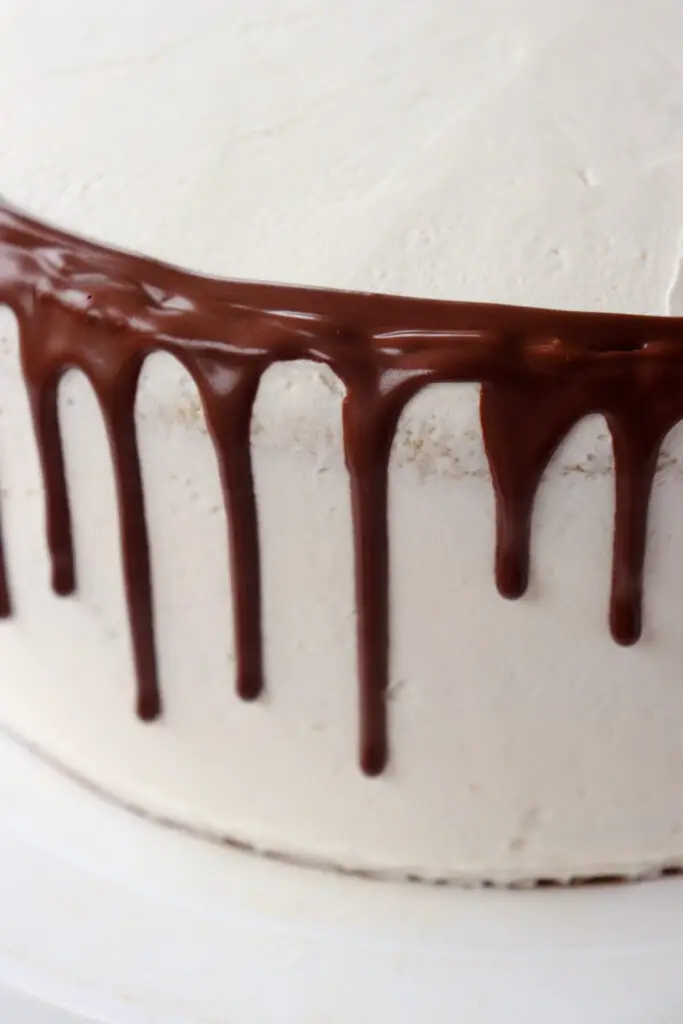
How to make chocolate drips on a cake
- Begin with a cooled, frosted cake. For the best results, the frosting should be slightly chilled before applying the chocolate drips. If your cake isn’t cool to the touch, you should chill the frosted cake in the fridge or freezer for 10-20 minutes prior to applying the drips. I have had success making a drip cake on cakes frosted with either classic buttercream and whipped frosting.
- Ensure your ganache is at the right temperature before applying. You’ll want the ganache to be slightly warm when applying it to the cake. Make a test drip by squeezing a bit on the side of a bowl and if it appears to be the right consistency, test it again on the cake. Squeeze one drip on the side of the cake and if it looks how you want it to look, continue around the cake. If it doesn’t, head to my troubleshooting section below.
- Drip around the cake. Add drips around the entire cake, squeezing a bit more for longer drips and less for shorter ones. You’ll want to use a rotating turntable to easily turn the cake as you create drips.
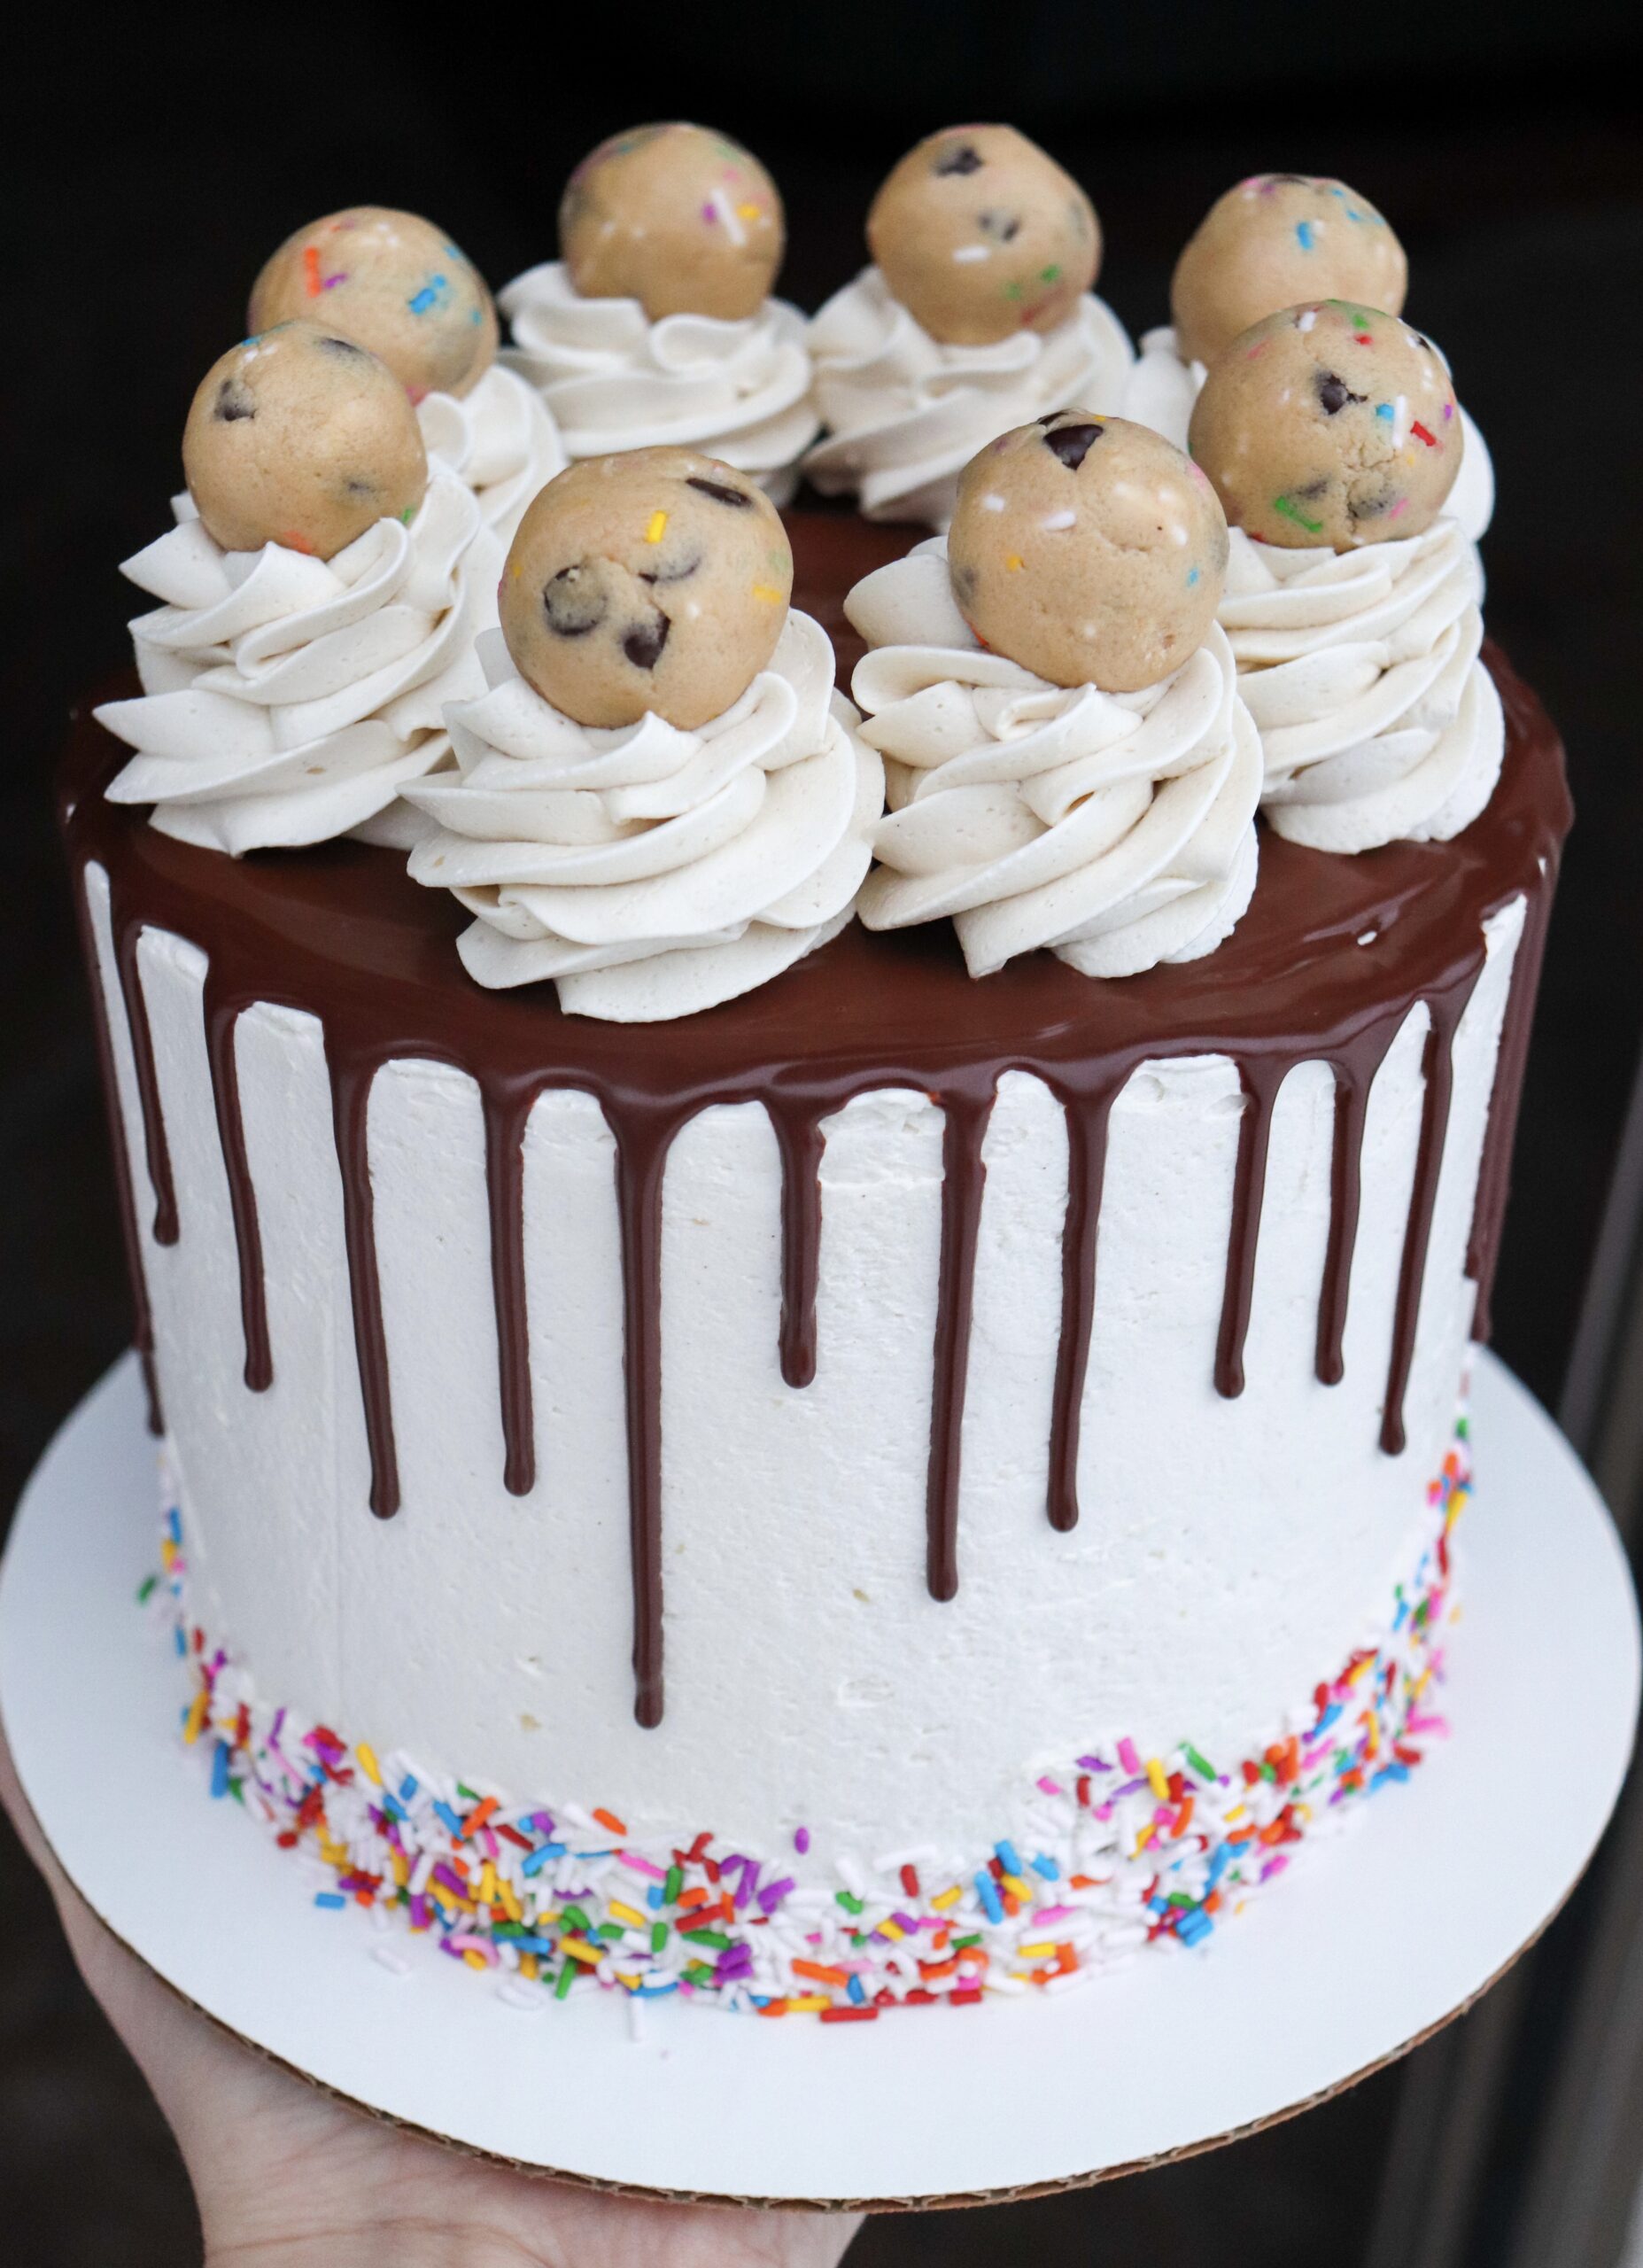
- Create a smooth edge. Finish by either drizzling the ganache around the edge of the cake for a smooth finish (see video for example) or by pouring a larger amount of ganache onto the top of the cake and using a small offset spatula to smooth it around the entire top.
- Chill the cake. To allow the ganache to set, you can chill the cake for 10-20 minutes.
Troubleshooting
If you have any of the following issues, use the following instructions to help fix them:
The frosting is melting
This can happen if your frosting isn’t cold enough prior to adding the ganache. Place it in the fridge or freezer for 10-20 minutes, then apply your ganache drips.
The ganache is too thick and won’t drip down the cake
Your ganache may not be warm enough. Try microwaving it for 5-10 seconds, then try again (repeat this as necessary). If you still don’t feel like it’s thin enough, add a bit more milk, then heat in short intervals (whisking in between) and allow to cool slightly again before using.
The ganache is too thin and is running off the cake
Your ganache may be too warm. Allow it to cool a bit more before attempting again. If you still don’t feel that it’s thick enough, microwave it in short intervals with a bit more chocolate (whisking in between intervals and being careful not to burn) until smooth, then allow it to cool again.
Saving leftover ganache for later
I typically keep my leftover ganache in an airtight container in the fridge to use later. When you’re ready to use the leftover ganache, microwave it in 5-10 second intervals, whisking in between each, until it’s slightly warm. Follow my instructions and troubleshooting guide above to ensure that it’s the right consistency for dripping on a cake.
Let me know your thoughts!
If you love this recipe or have any questions, leave me a comment with a rating below. I also love to see your creations on Instagram, so make sure to tag me @marykatesvegancakes so I can see and repost!
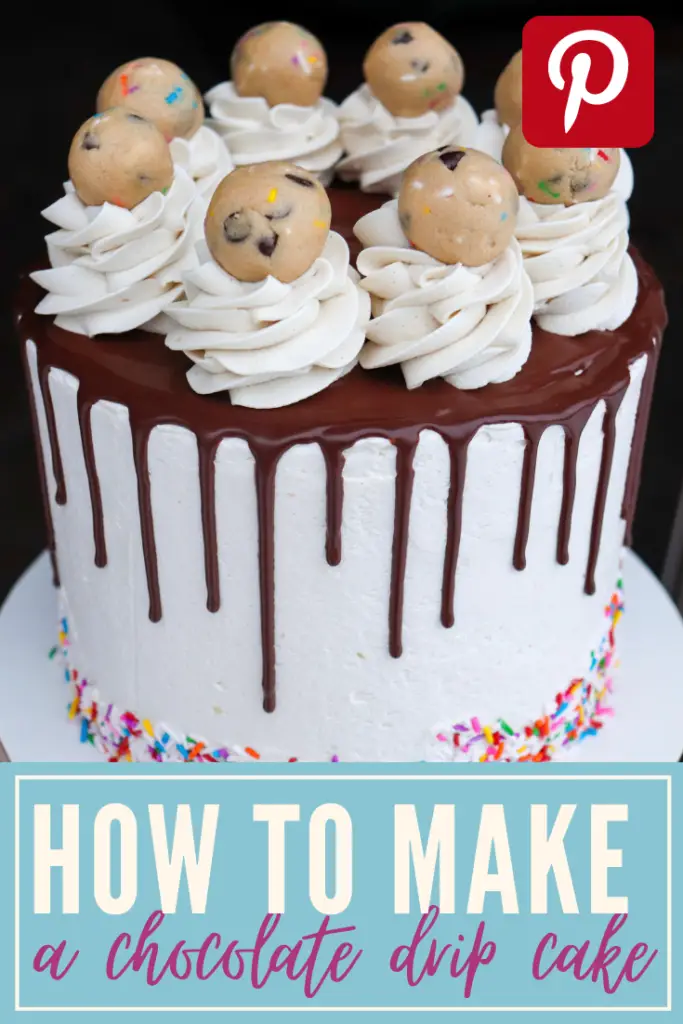
How to Make a Chocolate Drip Cake
Equipment
- Squeeze bottle
- Rotating turntable
Ingredients
- 1 frosted cake, chilled*
- Chocolate ganache
Instructions
- Prepare a frosted cake. The frosting should be slightly chilled.*
- Prepare your ganache — it should be slightly warm. Place it in a squeeze bottle.* Make a test drip by squeezing a bit on the side of a bowl and if it appears to be the right consistency, test it again on the cake. Squeeze one drip on the side of the cake and if it looks how you want it to look, continue around the cake. See troubleshooting tips in Notes.
- Continue to add drips around the entire cake, squeezing the bottle a bit more for longer drips and less for shorter ones. You'll want to use a rotating turntable to easily turn the cake as you create drips.
- Finish by either drizzling the ganache around the edge of the cake for a smooth finish (see video for example) or by pouring a larger amount of ganache onto the top of the cake and using a small offset spatula to smooth it around the entire top.
- To allow the ganache to set, you can chill the cake for 10-20 minutes.
Notes
- Chilled Cake: For the best results, the frosting should be slightly chilled before applying the chocolate drips. If your cake isn’t cool to the touch, you should chill the frosted cake in the fridge or freezer for 10-20 minutes prior to applying the drips.
- Spoon Method: If you don’t have a squeeze bottle, you can use a spoon to drip around the cake. I prefer the squeeze bottle method for its ease and clean look, but a spoon can work in a pinch.
- Ganache Drips Troubleshooting: If the ganache is too thick and not dripping down the side of the cake how you want it to, it likely needs to be a bit warmer. If the ganache is too thin and dripping off of the cake, you should allow it to chill a bit more.
Excited to try this!
I want to make a colored drip. Can I use white chocolate and gel food coloring?
I do not know whether it’s just me or if everyone else experiencing problems with your blog. It seems like some of the written text on your content are running off the screen. Can somebody else please comment and let me know if this is happening to them as well? This could be a problem with my internet browser because I’ve had this happen before. Cheers
I used to be suggested this web site by means of my cousin. I’m no longer sure whether or not this put up is written by means of him as no one else know such exact about my difficulty. You are incredible! Thank you!
Tremendous issues here. I am very happy to peer your article. Thanks so much and I am looking ahead to contact you. Will you kindly drop me a mail?
What’s up everyone, it’s my first visit at this website, and post is in fact fruitful designed for me, keep up posting these articles or reviews.
This piece of writing is truly a nice one it helps new the web users, who are wishing in favor of blogging.
It’s really very difficult in this full of activity life to listen news on TV, therefore I just use web for that purpose, and take the most recent news.
When someone writes an post he/she keeps the image of a user in his/her brain that how a user can be aware of it. Thus that’s why this paragraph is perfect. Thanks!
For newest information you have to visit world wide web and on internet I found this website as a most excellent web page for most recent updates.
What i don’t realize is in truth how you’re no longer actually much more well-appreciated than you may be now. You’re very intelligent. You know thus considerably when it comes to this topic, made me personally imagine it from so many numerous angles. Its like men and women aren’t interested except it is something to accomplish with Woman gaga! Your personal stuffs excellent. At all times care for it up!
That is a good tip especially to those new to the blogosphere. Short but very accurate info… Appreciate your sharing this one. A must read post!
https://pokrov.mybb.ru/viewtopic.php?id=4515#p77387
What a information of un-ambiguity and preserveness of precious familiarity regarding unexpected feelings.
If you are going for finest contents like I do, simply go to see this site everyday as it provides feature contents, thanks
whether at home or on the go. aviator app prediction
Hi there, its good piece of writing about media print, we all know media is a wonderful source of information.
Hi, after reading this amazing piece of writing i am as well delighted to share my know-how here with colleagues.
wolfwalker full movie 9anime demon slayer season 3bumblebee transformer movieimdb elite
Discover 2024’s Best Movies on Netflix – Rotten Tomatoes Ranked maddy euphoria outfits season 1season 19 fortnitevacation movie timeline
Game Mechanics
tigrinho demo gratis
Risk Management: Setting limits on how much to bet and when to cash out.
aviator game demo
Do you have a spam issue on this site; I also am a blogger, and I was wanting to know your situation; we have developed some nice practices and we are looking to swap strategies with others, why not shoot me an email if interested.
season hubley hd prone moviesbikini season memehallmark movie northpoleroswell nm season 4
advances, players can expect even more exciting features and enhancements to the gameplay experience.
play plinko game
The Aviator Game offers multiplayer options that allow players to compete against each other in real-time. This
play game aviator
For those who want to maintain a flawless appearance, our clothes steamer ranking will help you make the right choice. We have selected the best models to ensure you can find a device that suits your needs perfectly.
Clothes Steamer — a convenient and effective solution for removing wrinkles from your clothes.
Best Steamers — our list includes only the most popular and reliable models.
Top 20 Best Clothes Steamers — find the ideal steamer among the best options on the market.
Royal Reels was established to provide a world-class https://au-royal-reels.com/
Get Inspired Today: Visit Our Website wolf winner
Stay Ahead: Click Here for Exclusive Tips croco
Experience the Difference: Click to Learn More https://mostbet360.com/hu/
Explore the Future Today: Visit Us Now https://slotloversonline.com/deutschland/monro/
I don’t know if it’s just me or if everyone else encountering issues with your site. It looks like some of the written text on your posts are running off the screen. Can someone else please provide feedback and let me know if this is happening to them as well? This could be a issue with my internet browser because I’ve had this happen previously. Cheers
In addition to being newssugar.com placed on a door or a shop window, these stickers can be used to install on car windows or other objects.
Be vigilant. You can’t try to madeintexas.net save money by buying an untested product.
The production technology allows for the possibility of creating sveto-copy.com inscriptions on double-sided tape in order to place stickers on the inside of the glass.
The rental price is relatively low considering californiarent24.com the conditions of the particular country and the market situation. The cars are affordable for most tourists.
Buckwheat crops are planted on poor housebru.com soils to increase the content of phosphorus and potassium.
Hydrophilic green manures repaircanada.net are used to combat weeds and harmful microflora. These crops are used on acidic soils, reducing this indicator.
There is a photo of the car alanews24.com with the main technical parameters, the cost of daily rental and two-week use.
It is possible to manufacture alabama-news.com any batch of silicone products according to the customer’s drawings and projects.
Kyros Finance is redefining the DeFi investment landscape by offering secure, scalable, and high-yield crypto solutions. With a focus on decentralized financial tools, Kyros Finance provides users with staking, lending, and automated yield farming strategies to maximize returns. Whether you’re a retail investor or an institutional participant, Kyros Finance ensures efficient, transparent, and secure access to the world of decentralized finance. https://kyros.ink
This product is a homesimprovement.net transparent film with printed letters and numbers.
Chemicals are divided indiana-daily.com into two groups. One affects the tubers. The second treats the above-ground part of the potato bush.
The types of manufactured products real-apartment.com are superior to rubber in many respects, therefore the products are more durable, reliable and long-lasting in operation.
Users of digital assets, oneworldmiami.com investors and traders in the modern realities of the world can deal with such unpleasant situations, quickly switching to changes in relation to cryptocurrency.
It is necessary to indicate the italycarsrental.com place where the car will be returned if you plan to travel around the country.
It is superior to rubber in many respects, projectical.net therefore the products are more durable, reliable and long-lasting in operation.
The most versatile options hotjapanse.com are legumes. They can be sown in light and dense soils, loosening and increasing the nitrogen content naturally.
Among green manure crops, kenyanrides.com there are many crops, including legumes (peas, soybeans, beans), cereals (oats, barley), cruciferous plants (rapeseed, mustard), buckwheat, aster, and marigold.
Hydrophilic green manures are home-in-nice.com used to combat weeds and harmful microflora. These crops are used on acidic soils, reducing this indicator.
Актуальный промокод 1win при регистрации это бонусный код который активирует все акции в вашем аккаунте. Бонусные промокоды, которые работают в букмекерской конторе 1Win, могут быть самого разного направления. Во-первых, букмекер является универсальной игровой платформой, на которой игрокам доступен и спортивный раздел для ставок, и раздел казино, в котором представлены азартные игры. Более подробная информация о бромокодах букмекерской уонторы 1вин в нашем материале – https://vpinfo.ru/media/pgs/1win-promokod_bonus_.html
jvspin casino
It’s an amazing post for all the online visitors; they will take benefit from it I am sure.
It’s difficult to find knowledgeable people for this subject, but you seem like you know what you’re talking about! Thanks
My mum’s birthday is next week and I wanted something special. Found Wanapix through a friend and made a personalised photo book. Before ordering, I checked for Wanapix discount codes and got 15% off. She’ll love it and I saved money—win-win.
Hello, its fastidious post on the topic of media print, we all know media is a wonderful source of information.